The Moodifier Server
A professional lighting control, power management, security and surveillance server for Raspberry Pi, Linux & Mac
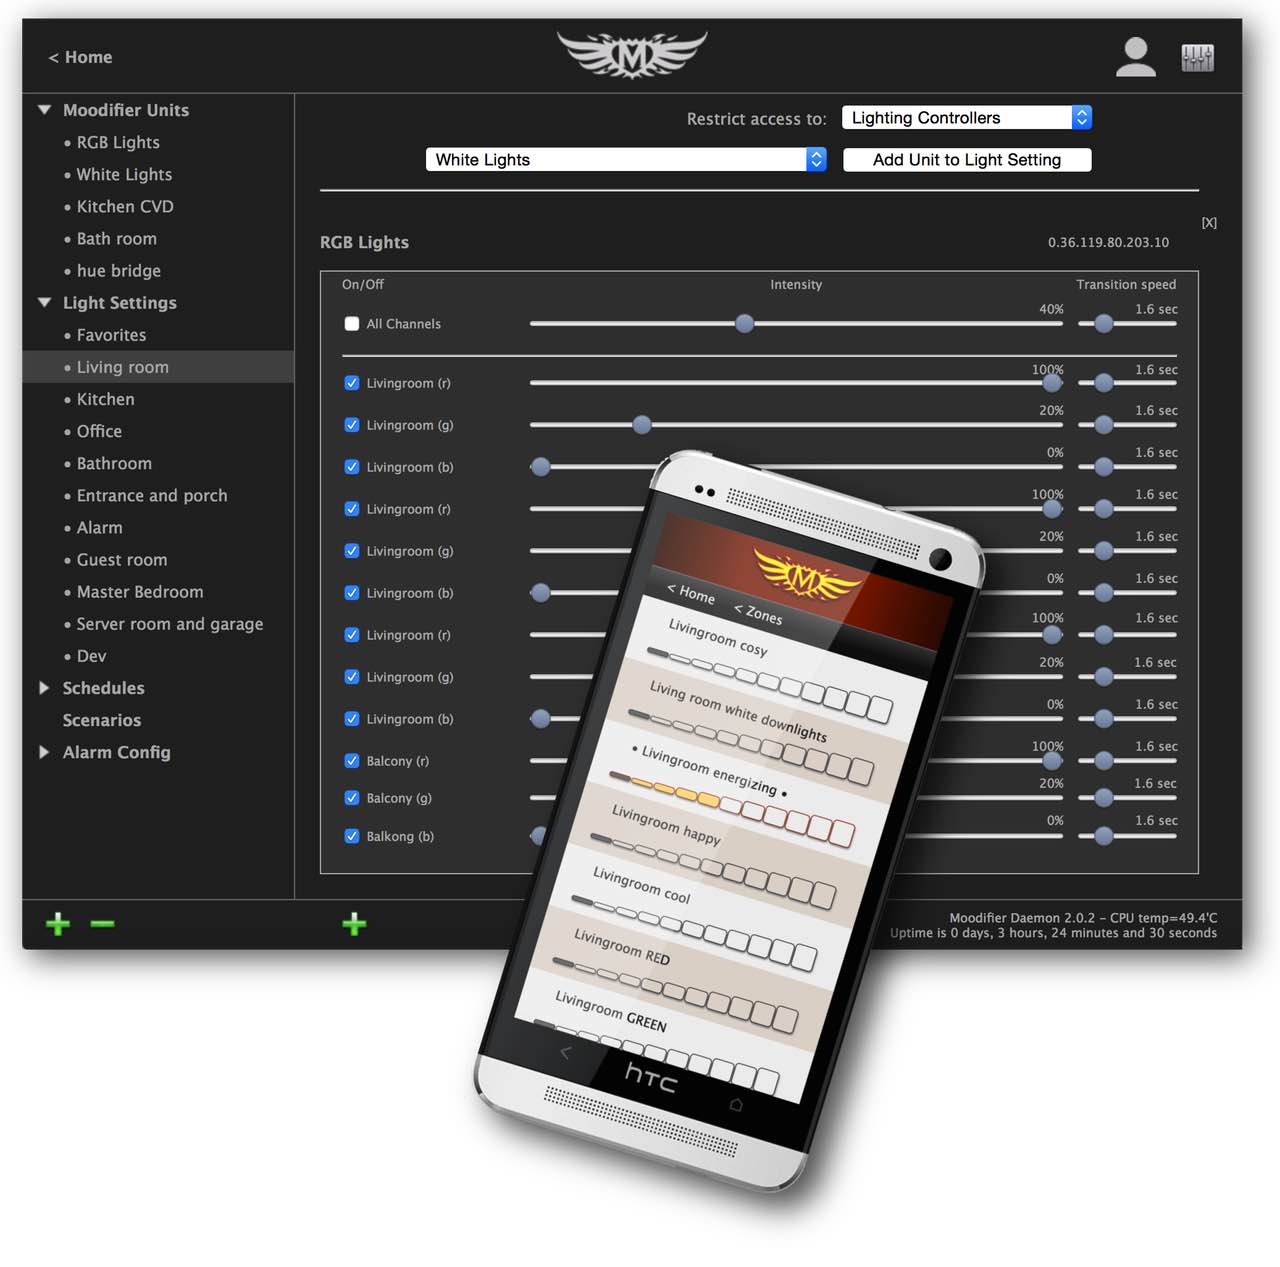
The Moodifier Server lets you schedule, automate and control your entire Moodifier and Philips hue lighting from any web browser on any device. It also lets you control relays, 0-10V and other high power equipment.

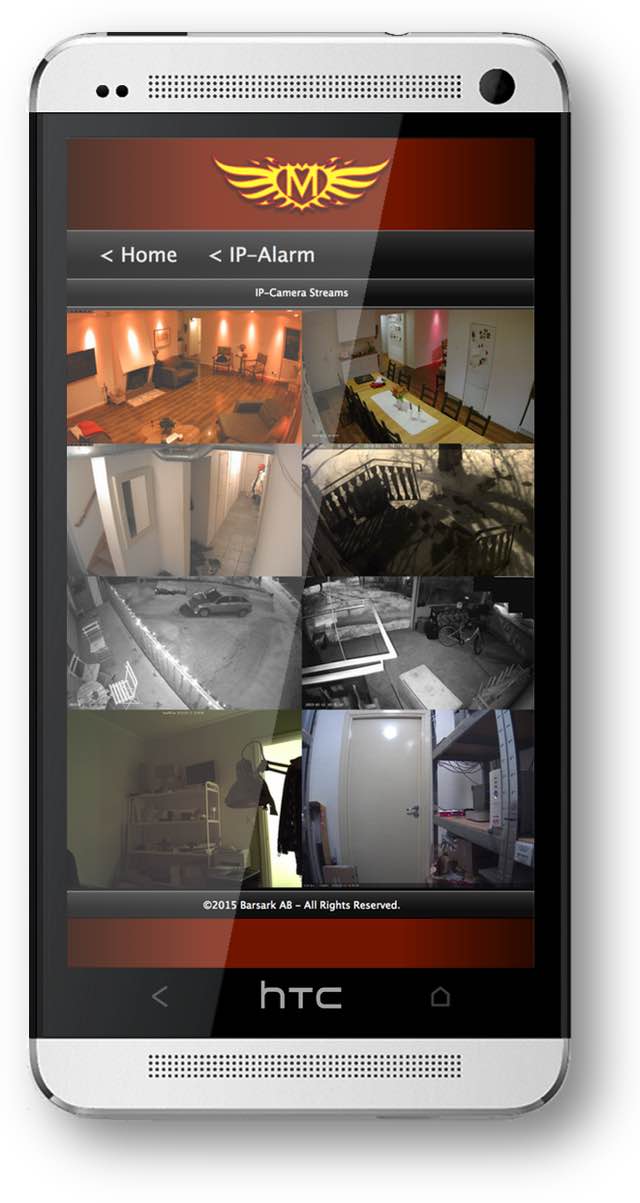
With it´s innovative IP-camera integration it also provides sophisticated occupancy sensing, surveillance and burglar alarm functionality.

Main feautures
• Full Moodifier lighting control.
• Full configuration of Moodifier wall switches.
• Full Moodifier status reporting.
• Philips hue lighting control (ZigBee lighting control, via hue bridge).
• Full light scheduling by time of day, day of week, weekends, weekdays, sunrise and sunset.
• Scene based lighting control.
• Unlimited number of light scenes.
• Organisation of light scenes in zones.
• Timed light scene playlists through light scenarios.
• IP-alarm functionality with intrusion alert, email (& sms) notifications, IP-camera image capture, monitoring and video recording.
• IP-camera occupancy sensing automated lighting control integration.
• Import and export of light settings.
• User level based access management of light settings and zones.
• On/Off NO/NC channel relay control.
• Advanced automated lighting scenario management.
• Event and status reporting to external SCADA systems.
• HTTPS encrypted access security.
• Guaranteed privacy and integrity! No cloud services or subscriptions required.

Download the Moodifier Server Documentation.


A free 30-day trial can be activated upon installation.

If you have comments, feature requests or questions?
- Contact Barsark!

Raspberry Pi installation instructions
Compatible 32-bit ARMv7 platforms
• Raspberry Pi 2 - verified and fully supported.
• Raspberry Pi 3 - verified and fully supported.
• Raspberry Pi 4 - verified and fully supported.
• Orange Pi Plus - not verified.
• Orange Pi Plus2 - not verified.
• Others - not verified.

How to Install the Moodifier Server on your Raspberry Pi 2, 3 or 4.

1) Download the zipped InstallMoodifierDaemonRPi.sh.zip shell script to your home folder on the Raspberry Pi with Terminal using the following command (all on one line):
curl -o ~/InstallMoodifierDaemonRPi.sh.zip https://www.barsark.com/InstallMoodifierDaemonRPi.sh.zip

2) Unzip it with Terminal using the following command:
unzip -o ~/InstallMoodifierDaemonRPi.sh.zip -d ~/

3) Run the InstallMoodifierDaemonRPi.sh shell script in Terminal on your Pi using the following command:
~/InstallMoodifierDaemonRPi.sh

-Follow the instructions and MoodifierDaemon should then be running on port 80 on your Pi.

4) Use a web browser to access the Moodifier Server on your Pi, browse to the ip address of your Pi or visit http://home.moodifier.net and you should be automatically redirected to your Pi.

5) Once the server application is running on your Pi you can easily enable secure and encrypted HTTPS access on port 433 with a self signed cert by simply clicking a button in the admin web interface of the application.

For further info and installation options please read the documentation in the InstallMoodifierDaemonRPi.sh shell script.

Linux installation instructions
How to Install the Moodifier Server on your x86 Linux box with terminal

Compatible x86 64-bit Linux flavours
• Ubuntu 12.04 or later - verified and fully supported on Ubuntu 16.04.3.
• Debian 6.0 or later - verified and fully supported on Debian 9.2.1.
• CentOS 7.0 or later - not verified.
• Linux Mint 16 or later - not verified.
• OpenSUSE 11.3 or later - not verified.
• Fedora 13 or later - not verified.

1 Ubuntu, with sudo) In terminal, become root with the following command
sudo -i

1 Debian, without sudo) In terminal, become root with the following command
su
1.1 Debian, without sudo) In terminal, move to root home
cd /root/

2) Install curl with the following command
apt-get install curl

3) Download the zipped InstallMoodifierDaemonLinux.sh.zip shell script with Terminal using the following command (all on one line):
curl -o ~/InstallMoodifierDaemonLinux.sh.zip https://www.barsark.com/InstallMoodifierDaemonLinux.sh.zip

4) Unzip it with Terminal using the following command:
unzip -o ~/InstallMoodifierDaemonLinux.sh.zip -d ~/

5) Run the InstallMoodifierDaemonLinux.sh shell script in Terminal on your Linux computer using the following command:
~/InstallMoodifierDaemonLinux.sh

-Follow the instructions, you will be prompted to confirm installation steps with a 'Y' and enter key.
The Moodifier Server should then be running on port 80 on your Linux box.

6) Use a web browser to access the Moodifier Server on your Linux box, browse to the ip address of your Linux box or visit http://home.moodifier.net and you should be automatically redirected to your Linux box.

7) Once the server is running on your Linux box you can easily enable secure and encrypted HTTPS access on port 433 with a self signed cert by simply clicking a button in the admin web interface of the application.

For further info and installation options please read the documentation in the InstallMoodifierDaemonLinux.sh shell script.

macOS installation instructions
How to Install Moodifier Server on your Mac

1) Download the Moodifier Daemon application for macOS.

2) Move the Moodifier Daemon folder to where you would like to run it from.
The Moodifier Daemon application and supporting files are located in the Moodifier Daemon folder.

3) Open Terminal and execute the Moodifier Daemon application to run on port 8080 like this:
/path/to/your/MoodifierDaemonFolder/MoodifierDaemon --Port=8080

4) The Moodifier Server should now be running on port 8080 on your Mac.
Use a web browser to access the Moodifier Server on your Mac, browse to port 8080 on the ip address of your Mac (for example "http://127.0.0.1:8080/") or visit http://home.moodifier.net and you should be auto redirected to your Mac.

5) Once the Moodifier Server is running on your Mac you can enable HTTPS by generating a self signed cert from the web interface of the application. Once you have generated the self signed cert you can activate HTTPS on port 8433 in Terminal like this:
/path/to/your/MoodifierDaemonFolder/MoodifierDaemon --Port=8080 --SecurePort=8433 --certificate=/full/path/to/your/MoodifierDaemon.crt

Running Moodifier Server on ports below 1024 requires root privileges.

If you like to run the MoodifierDaemon on port 80 or 433 you need to start it from terminal as root like this:
sudo /path/to/your/MoodifierDaemonFolder/MoodifierDaemon --Port=80 --SecurePort=433 --certificate=/full/path/to/your/MoodifierDaemon.crt

About Moodifier

Contact

No tracking